

Hello, and welcome to the Pubbets Lab!
This is where an idea, a few rough sketches, a pile of plastic eyes, and, yes, a frankly ridiculous amount of fur come together to become real puppet characters. I'm James Marshall, the guy who started Pubbets, and I thought you might like to see exactly how your custom puppet gets made.
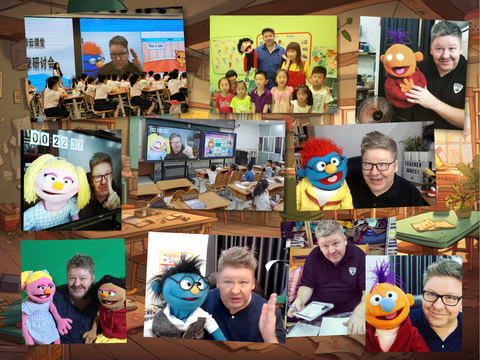
I kicked off Pubbets back in 2018 when I was still teaching. Honestly, I just couldn't find puppets that were big, bright, and expressive enough to really hold the students' attention. So, I figured, "Why not have a try myself?" and started building them on the kitchen table.
Things have certainly moved on a bit since then. Today, we're in a proper workshop, with shelves full of puppet blanks, fabrics, tools, and a fair few half-finished characters that always seem to be staring at me from the sidelines.
I also have a great assistant who helps with preparing wigs, outfits, and materials, which lets me focus on the building, finishing, taking photos, and getting everything packed up.

Every puppet that leaves the Lab is made by hand, with a lot of care. We follow a pretty straightforward process to make sure your order is looked after from beginning to end.
Here's how it all works.
Step 1: Your Idea Arrives
Once you've put in your custom puppet order, you'll get a welcome email with your expected finish date and a few helpful links. This message also confirms that your puppet is officially in the queue. From then on, you can reply anytime if you want an update or have extra details to share. We try to keep things simple so we can spend more time actually building, and less time buried in paperwork.
Step 2: Getting Ready – Prep and Materials
First, we choose the right puppet blank from our storage shelf and gather all the pieces, accessories, and outfit pieces that match your design choices. My assistant then gets busy preparing wigs, trims, outfits, and glasses, before handing everything over to me for assembly. At this stage, the puppet often looks a bit odd and unfinished, but it's always interesting to see the early stages come together!
Step 3: The Build
This is where your puppet really starts to come to life. I carefully place the features, fit the outfit, check all the proportions, and make sure the character looks natural and expressive. Some puppets have simple features, while others have a long list of specific details. Either way, each one gets the same careful attention.
Step 4: A Bit of a Rest – Drying and Checking
Once the main work is done, the puppet gets to sit quietly while all the glues and attachments properly cure. After this, I go over everything again to double-check that the eyes are straight, the seams look neat, and that the personality is really shining through as it should.
Step 5: Photo Time!
Your finished puppet takes a quick trip to our photo corner where I snap a set of clear, bright photos from different angles. Some puppets pose easily, others put up a bit of a fuss! But they all cooperate in the end. When the puppet is finished, we take four photos - front, back, left, and right full-body photos - which are emailed to you before shipping so you can get a good look at your new character.
Step 6: Packing and Sending Home
Your puppet is carefully wrapped, placed in a carry bag, and packed safely for its journey. We prepare the shipping label using your chosen method, and your tracking number is sent to you as soon as the parcel is on its way.
From Idea to Reality: An Example Build
Here’s an example using a puppet we called Charlie. This shows you how a design can become a finished companion.
Puppet Body Selection: We started by choosing the correct body colour from our shelves.
Hair Attachment: Charlie needed white fur. We picked the right shade, and my assistant sewed it securely to his head.

Adding Glasses: You picked white square frames. These were sewn on at four anchor points to keep them strong and stable.

Dressing: Charlie’s teddy overalls outfit was fitted, adjusted, and photographed to make sure everything sat correctly.

Queue: Once prepped, Charlie waited his turn for face placement.
Eyes and Nose: You selected round eyes with blue lids. Each piece was handmade and installed with care.
Assembly: The features were placed and adjusted to get just the right expression.
Drying Time: Charlie rested for twelve hours before the final checks.

Photo Shoot: Once finished, he had his photo session so you could see how he turned out.
Packing: Charlie was wrapped carefully, placed in his bag, and prepared for shipping.
This is the journey every custom puppet takes. It's a lot of hands-on work, plenty of checking, and those moments where the puppet really seems to develop a personality before I'm even finished with it.
The Pubbet Promise
Every puppet is built with care from start to finish. We want your character to feel expressive, durable, and full of personality. Whether you're ordering a puppet for performing, teaching, content creation, or just for a bit of fun, we're genuinely honoured to bring your idea to life.
Thanks for trusting us with your character. We can’t wait for you to meet them!
James
The Papa of Pubbets!